NINJA JUMP SAFETY MANUAL
READ AND SAVE THESE INSTRUCTIONS
WARNING: THESE RULES MUST BE FOLLOWED TO AVOID SERIOUS INJURY OR DEATH.
SUPERVISION BY A QUALIFIED ATTENDANT IS REQUIRED AT ALL TIMES
- REMOVE shoes, eyeglasses and any sharp objects.
- Somersaults, diving, wrestling, rough play and flips are prohibited.
- NO food, drinks, gum, pets or silly string.
- Individuals who may be particularly susceptible to injury from falls, bumps, or bouncing should not use this product. You should consult a physician before using this product.
- EXIT if the unit begins to lose air. USE exit doors and escape hatches.
- DO NOT use and immediately deflate the inflatable if winds exceed 15 MPH and/or it rains.
- Riders SHOULD all be of compatible age and size. (Please refer to the Information Plate provided on the unit.)
- The inflatable MUST be securely tied down.
- Keep children away from the blower at all times.
- Bounce away from others and away from the sides.
- DO NOT jump on to or off the inflatable.
CAUTION: This is an electrically operated product. Not recommended for children under 3 years of age. As with all electric products, precautions should be taken during handling and use to prevent electric shock.
The blower requires a GROUND fault protected circuit (GFCI). Please refer to the blower manufacturer Owner's Manual for safety and operational instructions.
Set-Up
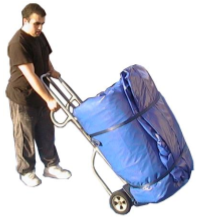
Set-up, installation, deflation and handling should be done by a QUALIFIED ATTENDANT ONLY. The inflatable may weigh over 200 lbs. Caution should be exercised when lifting and handling the equipment. Use a dolly to move the equipment.
- DO NOT set-up when windy and or when it rains.
- Select a level area that is a safe distance from water, walls and other obstructions.
- Make certain that there are no overhead utility wires and ground obstacles such as protruding sprinklers or underground pipes of any kind before laying the protective tart on the selected area.
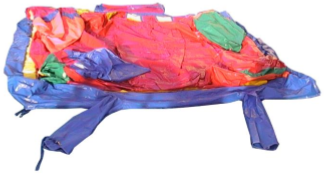
- Place the inflatable in the middle of the tarp and unroll the unit after removing the straps.
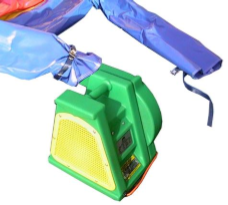
- Connect either tube snugly (choose the one closest to the electricity source) to the blower using the strap attached to the tube. Make sure that all intake openings of the blower are free from any obstructions.
- Twist the vent (the other tube) several times, fold it over and secure snugly with the attached strap.

-
Approximately one foot from each tie down double-loop of the Ninja Jump unit, drive an anchor to the ground at a 45° angle with the head pointing away from the Ninja Jump unit. Secure the Ninja Jump unit at all times to the corresponding number of anchors. Use the straps to attach the anchors to all the double-loops as provided in specific areas on the base of the Ninja Jump unit.
Large units with high profiles (Giant Slides, etc) have additional tie down loops that are located at higher points. Each of these additional locations should also be attached to the anchor at a 45° angle.
When the unit is on hard surface (cement, wood floors, etc.), substitute a sand bag with adequate weight for the anchor.

- Plug the blower into the closest properly grounded (GFCI) 110v outlet only after you carefully read the blower manufacturer’s safety instructions. Turn the switch on and wait (approximately 2 minutes) until the inflatable is fully inflated and the equipment and all parts have been examined for potentially unsafe conditions before letting children in the inflatable.
- This unit requires continuous air pressure. Do not turn the blower off while children are in the inflatable.


Deflation Procedure
- Make sure there are no children inside or around the Ninja Jump unit prior to turning the switch off and unplugging the blower.
- Disconnect the air tube from the blower and untie the second air tube. Let both air tubes lie parallel to each other so the air can escape freely.
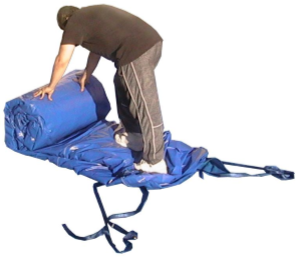
- As the Ninja Jump unit deflates, arrange the columns to fall on top of the base making sure that the deflated unit is evenly spread out.
- Standing in front of the Ninja Jump unit (Entrance), fold the left side and the right side so that they meet in the middle and then fold one side over the other.
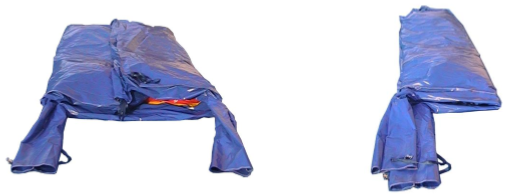
- Roll the Ninja Jump unit towards the air tubes and then tuck the air tubes into the roll.
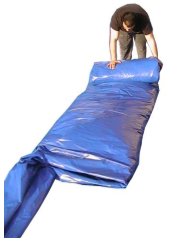
- Secure the roll with each strap tied into a slip knot.
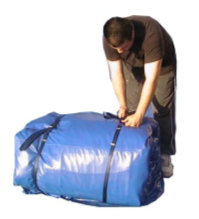
- Dolly the Ninja Jump unit into a dry area for storage.


Maintenance Procedures
- It is good practice to clean the Ninja Jump unit after each use.
- Use mild dish-washing liquid and clean rags for general clean-up, preferably while the Ninja Jump unit is inflated.
- Never use solvent-based cleaners to avoid damaging the fabric and printing.
- Make sure the blower and the Ninja Jump unit is completely dry before rolling up and storing
Repair Procedures
- To repair holes and tears up to 12”, use the “Single Patch Method,” utilizing the patch repair kit provided with each Ninja Jump unit.
- Cut an oval or round shape vinyl patch approximately 2” larger than the cut/tear.
- Clean the area around the cut/tear.
- Apply glue on the patch and on the area around the cut/tear.
- Let the glue dry for 3 minutes.
- Place the patch over the damaged area and press with your palm for 1 minute.
- In approximately 15 minutes, the glue should dry and the Ninja Jump unit will be ready for inflation.
© United Inflatable Rides. All rights reserved.
Powered by EventRentalSystems